Snapseed is a potent and amazingly user-friendly tool for photo editing, developed by Google. It is available on the Play Store on Android as well as App Store on iOS. Having a comprehensive layout and literally thousands of possibilities to edit your favorite photos, Snapseed is currently one of the best photo editors out there. This Snapseed tutorial is all about editing pictures to make them more attractive and catchy.
Although Snapseed mobile is not up to the mark with the magical photo editing prowess of desktop editors like Lightroom or photoshop but for editing on your phone, it is certainly the best editor you can get on Play Store.
However, one needs to have a certain skill level to edit pictures in Snapseed but that doesn’t mean you can’t do it. This article, although not an in-depth tutorial, is a beginner’s approach towards editing in Snapseed on mobile. Before proceeding, know that this tutorial was performed on Snapseed for Android, and that same process can be replicated if you are an iOS user.
Select a Picture

To begin, open Snapseed and you will see a blank screen with a “+” sign. Tap on it to add your picture. Once the picture is added, you can also know more information about the picture by clicking on the (i) icon in the upper right-hand corner.
Know What You are Doing
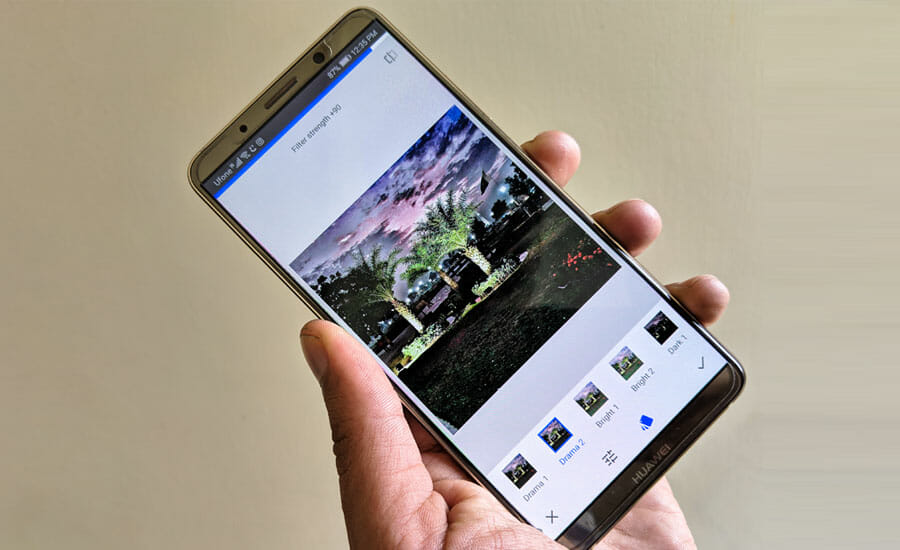
At the bottom, you’ll see three major tabs with “Styles,” “Tools” and “Export” naming on them. The “Style” tab includes what you may call the presets or filters. Applying a particular style to a picture will change the way it looks. Some styles contain more contrast while some make the image look more saturated.

In “Tools”, you’ll find everything that you need to edit your image in detail. From here you can improve color, exposure (brightness levels), and detail in your photos.
Tune Image
Once you have opened a picture in Snapseed, click on the Tools tab and it will give you a plethora of options to choose from. Tap the tune image option from there. It is a collection of the most used image fixers you can find on any desktop editor.
At the bottom, the tune image option contains an apply and discard icon, an adjust icon and an “auto adjust” icon. If you click on the auto adjust, it will automatically enhance the picture and if that’s not enough for you, carry on with manual adjustment.
When you click on the adjust icon, a menu pops up with more options. This is the tool used most often because it greatly improves the picture. You can slide up and down to select an option and then swipe right or left to apply that fixer. Here is how this Tune Image tool can affect your photos.

Brightness: Increase or decrease the brightness of the image
Contrast: By this, you can increase or decrease the difference between dark and bright areas.
Saturation: More saturation means more vibrant colors, less means dull colors
Ambiance: Ambiance is an amalgamation of Saturation and Contrast. By increasing or decreasing it, you can enhance both at the same time
Shadows: This lets you darken or lighten only the shadows (dark areas) of your image
Highlights: This will only increase or decrease highlights (Bright areas) of the image
Warmth: This adds a warm yellowish-orange or cool blue color cast to the image. More warmth means more orange color and less warmth means more blue color in the image.
You can increase or decrease the above options as per your liking. Be sure that your image does not overexposed nor does it get too dark. Once you are done with image tweaking with these options, click on the application icon in the bottom right corner.
Details
The details tool brings out the fine details and texture in your mobile phone photos. Although you can apply it to any picture, this tool works very well with pictures that have some texture in them like wood gain, rust, paint peeling and fabric, etc
Once you have tapped details, you can swipe up and down to select between structure and sharpening.

Structure: This option works best with concrete objects that have a texture that you want to pop out. Swipe left or right to increase or decrease the texture.
Sharpen: The sharpening tool can be generally used on any picture to bring out details but using it too loosely will reduce the quality of the image and introduce too much grain and noise.
White Balance
The white balance option lets you enhance your picture by applying different color tints. These color tints can be used to enhance and correct unwanted colors. Just by changing this, you can modify the mood of your photo.

There are two options under the white balance tool.
Temperature: This makes your photos look warmer (more yellowish-orange) or cooler (more blue)
Tint: You can increase the tint by swiping right or left. This adds a green or a pink tint to your image.
Crop and Rotate
The crop tool lets you crop your picture in different aspect ratios. Once you click the crop option, you’ll see a slider on the bottom with all the aspect ratio options that you can crop your photo with. This tool is perfect for cropping your picture to Instagram size or if you want to make a Facebook cover photo, you can use the “Crop” option to cut your picture in the desired size.

The next one is the rotate tool. It not only lets you rotate your picture but also has a flip option so you can flip your picture horizontally if you want to. Both the options can be found on the bottom bar once you select the rotate button within the tools..
Though you can rotate the picture clockwise or anti-clockwise, you can also tilt the picture by holding it with a finger and tilting it to the extent that you like.
Healing
This is one of the most useful tools in Snapseed, we are all prone to making mistakes in our pictures. Let’s say you have snapped an amazing photo and by chance, there is any unwanted small object or spot that is spoiling the photo, you can just remove it with this tool. It can also be used to remove blemishes in portrait shots too.

All you have to do is click tools, tap on healing. Now use two fingers to zoom on the object that you want to remove and use two fingers to move the picture. Brush on that object using your finger. This will highlight the object with red color. Once you lift your finger up, the object will vanish.

If your object is surrounded by a plain area, you’ll get much better results. If you don’t get good results, tap on the black curved arrow on the top and from there you can undo what you’ve done. Try repeating the process to achieve the perfect result.
Brush
The Brush tool gives you utmost control over the adjustment of color and brightness in selective areas of the image. If you want to brighten or darken some parts of the image and not the whole, this is the best tool for you.
It lets you increase or decrease exposure and adjust temperature and saturation in selective areas. Just click on the brush option and you’ll have the “dodge and burn”, “exposure”, “temperature” and “saturation” tabs on the bottom of the picture. Select whatever you want to adjust and just swipe on the areas you want to treat.

You can also increase or decrease the intensity of the effect at the bottom with the help of the arrows
Noir
This option lets you create moody and cinematic black and white pictures. After selecting Noir, tap the cards button on the bottom to select a style that best suits you. A single style can also be enhanced further. Swipe vertically on the image to access the edit menu. It includes the following.
Brightness: Darken or lighten the image.
Wash: It lets you change the mood and contrast of the picture.
Grain: Natural-looking grain can be added to the picture with this.
Filter Strength: Increase or decrease the strength of the filter that you use on your picture.

Once an option has been selected, swipe horizontally on the picture towards left or right to increase or decrease the value.
Portrait
The portrait is the most amazing tool for all you selfie lovers out there. It lets you tweak your portraits and gives complete control over the picture. You can use it to brighten the faces, smooth out the skin, and sparkle the eyes of the subject in the portrait.
In the Snapseed Tools, tap portrait and select a preset from below that looks best on your image i.e “spotlight 1” or “smooth 1” etc. Now swipe up or down to access the options including Face spotlight, Skin smoothing, and Eye clarity. Select the option that you want to edit and swipe left or right to adjust the setting. Here’s what these options do.
Face Spotlight: It makes the face of your subject brighter while slightly darkening the remaining parts of the picture
Skin smoothing: It smoothes out the skin of the subject but unlike mobile cameras that make you look artificial, Snapseed does it with elegance so it doesn’t look over-treated
Eye clarity: This gives you clear and sparkling eyes.

Just be careful not to apply too much skin smoothing or eye clarity. This way your picture will lose its naturality.
Once you are done with all your edits, just tap on the Export tab to save the picture. If you hit the “Export” button it will save the picture in its default folder and “Export As” will give you an option to save the picture wherever you want.
These are the basic editing techniques that beginners can use to achieve their desired results. Snapseed is a very powerful tool that even professional photographers use for editing. So to have a complete grasp of this tool is almost impossible unless you are a pro. However, we have tried to cover the basics of Snapseed which you can practice on to get the most out of your mobile photography edits.
Great. This is very detailed information and I have learnt a lot from this.
Amazing…